
Dan Perich, WSO Webmaster
March 2023
Artists often need to resize images in order to enter an exhibition or to prepare for printing. An exhibition may require a specific size, such as “1200 pixels on the longest side”.
There are many tools available to resize images. Here we’ll use Pixlr, a free web-based tool which can be used from a Windows PC or a Mac.
Pixlr makes several image tools available. For these instructions, we’ll use Pixlr E, Pixlr’s free photo editor. Without an account, Pixlr E allows 3 file saves per day. Signing up for a free account may allow more saves per day.
To resize an image using Pixlr E:
- Open Pixlr E by going to https://pixlr.com/e/ using any Web browser.
- Drag the image file you want to resize onto the Pixlr E web page. This will open the file.
— Or —
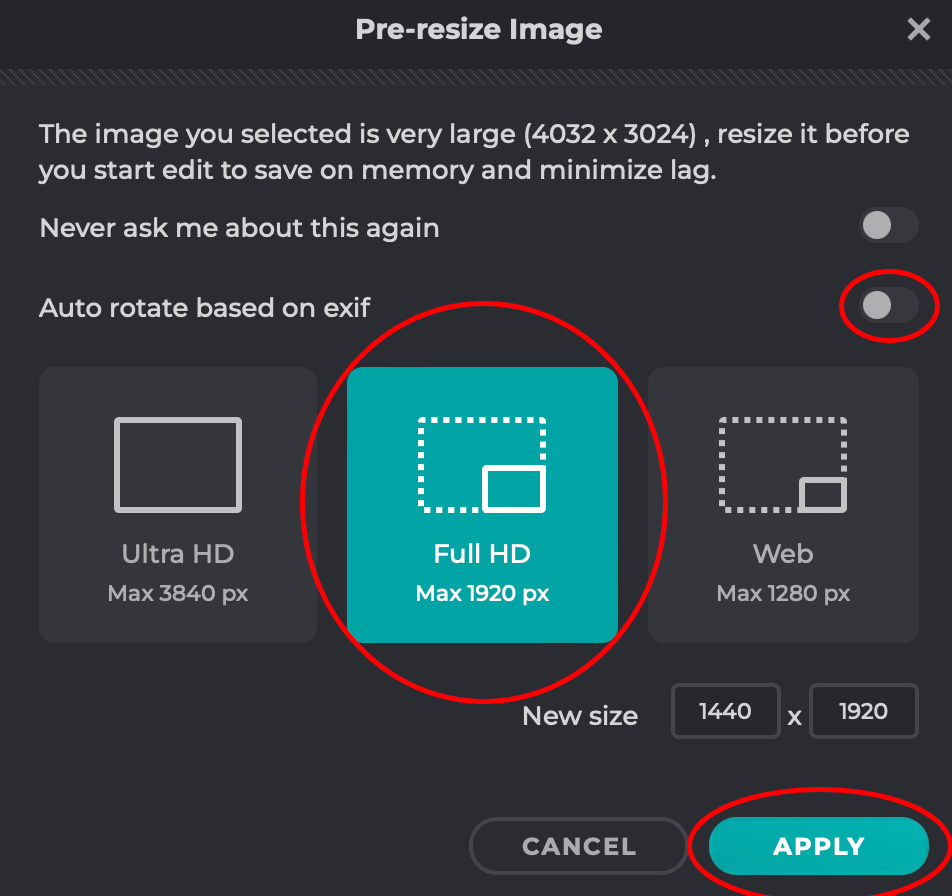
Click the button “Open Image”, navigate to the file you want to resize, select it and click “Upload”. - A window titled “Pre-resize image” may appear. If this window does not appear, no worries, all is well. If it does appear,
- Ensure that the “switch” labeled “Auto rotate based on exif” is “off”. The “switch” should be dark and to the left.
- Click on “Full HD”, then click on “Apply”.
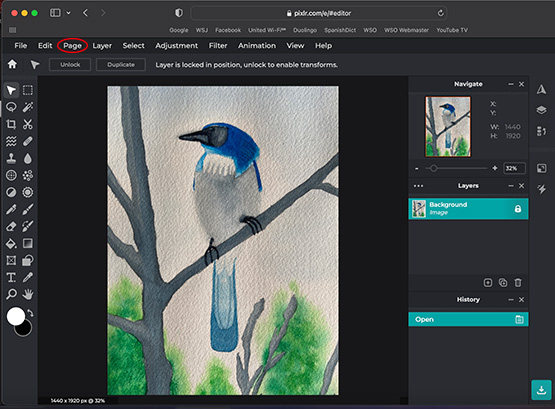
- A window will appear, showing the image in a window with a lot of controls.
- From the menu at the top, select “Page” and then “Smart Resize”.
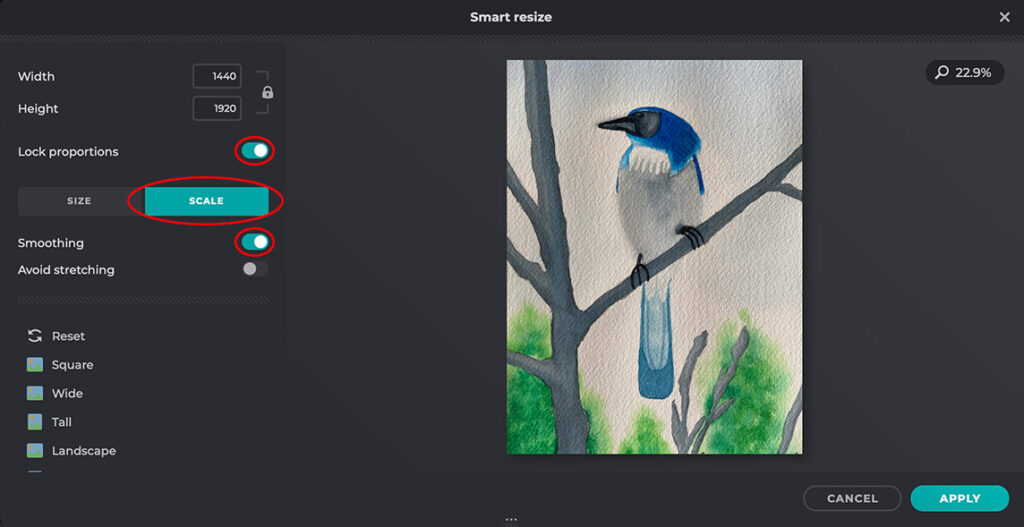
- A window titled “Smart resize” will appear. Ensure that “Lock proportions” is selected (colored and to the right), “Scale” is selected (colored), and “Smoothing” is selected (colored and to the right).
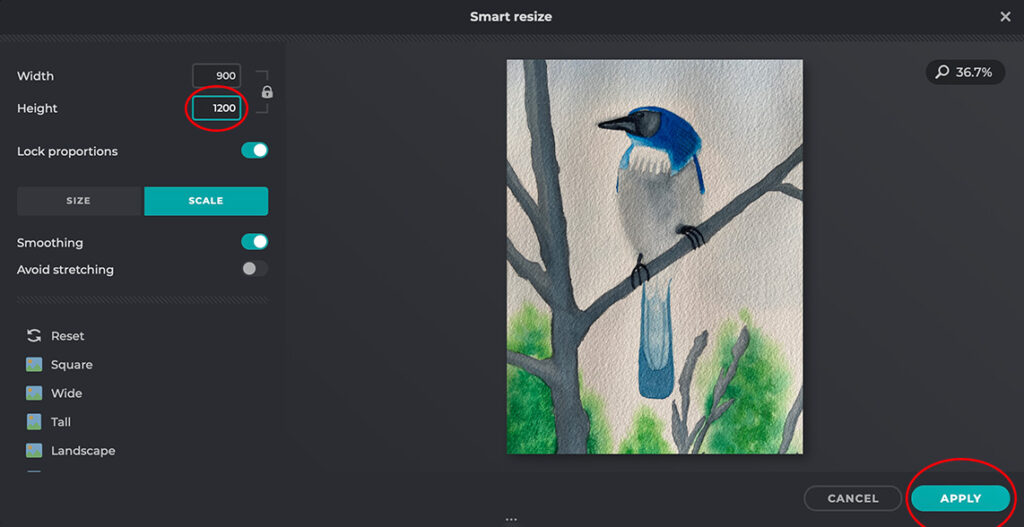
- Determine whether “Width” or “Height” is the larger number. For whichever is larger, type “1200” into that box, replacing the previous number. The other dimension will automatically adjust to scale.
- Click “Apply” in the lower right corner of the window. The window will close.
- Click the colored “download” button in the lower right corner of the window.

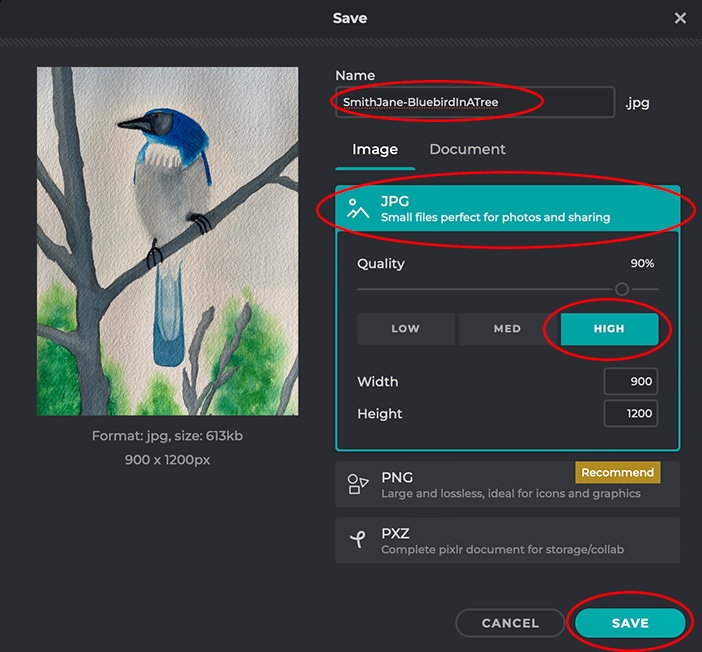
- A window titled “Save” will appear.
- In the box under “Name”, type in the filename you’d like to use for the file. For a WSO exhibition, the filename would be of the format “SmithJane-BluebirdInATree”.
- Select “JPG” and then “High quality”, then click the “Save” button.
That’s it, you’re done! On a Mac, the resized image has been saved to your “Downloads” folder.